Ceramic Floor Vases
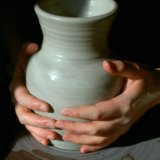
Large Handmade Vases
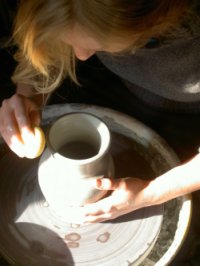
See how artists make large ceramic floor vases.
A vase is actually relatively cheap to make, but due to their size and difficulty to make and transport you'll find their sale prices quite a bit higher.
Learn about how they are created and discover other great handmade ceramics.
Ceramic floor vases are challenging and fulfilling to create.
The fulfillment is in creating such a large, elegant form.
Buying a Vase?


If you are looking to purchase a large ceramic floor vase see this wide selection of vases .
.
You can browse hundreds of unique styles and elegant designs.
They come in a wide range of colors, sizes and materials. One thing is sure, though, they will enhance the elegance of any living room decor.
With considerable skill one can throw large vases from one piece of clay.
However, this can be extremely difficult.
The challenge is in their sheer size and their many curves and angles.
Of course, I always encourage you to try everything to test the limits of the clay.
Here is a unique technique for creating them in two pieces.
For this example, we'll learn how to throw it in two separate pieces and then join the them together.
The Bottom
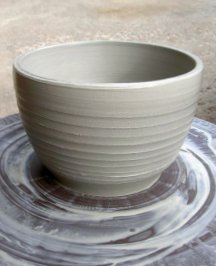
You'll need about 8 pounds of clay for the first piece. If you don't have a scale in your
pottery studio,
you can divide a 25 pound bag of clay into three even pieces to get close enough.
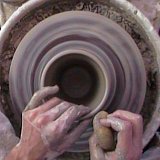
Begin by centering the
pottery clay
and pulling up the walls. Angle the walls inward as you pull up to add strength and to counteract the centrifugal pull of the spinning wheel. Leave extra thickness on the rim for strength.
Tip: To make centering easier with larger pieces of clay, first pat the dry clay as it turns to get it as centered as possible before adding water.
Tip: Focus on good body position, using the weight of your body rather than the strength in your muscles.
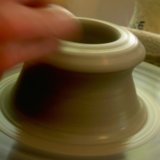
As you throw, continue bringing up and thinning the walls until they are half an inch thick. Then, pushing from the inside, stretch the walls until they flare outward slightly, forming a very tall bowl. This will thin the walls to about a third of an inch.
Finally, create a shallow trough in the rim by pressing your finger down on the center of it. This way the top piece will set into this trough so they can connect more easily.
Measure the width of the rim. Cover just the rim with a plastic bag so it doesn't dry out. Then, leaving the pot attached to the bat, set the bottom piece aside to firm up.
The Top
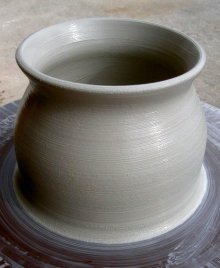
You'll throw the top half almost like the bottom, except, you won't need a floor on this piece because it's going to be the top of your vase.
Measure the bottom diameter of the pot using calipers.
It should match the measurements of the bottom rim so it will set perfectly into the trough on the rim of the bottom piece.
Form and finish your rim.
The neck should be wide enough for your hand to fit inside when you are joining the two pieces of the ceramic floor vase together.
Cut under the pot with a clay wire, just like you would when cutting a pot off the wheel. Leave the pot on the bat.
Set the top half aside to dry.
Let both of your pots dry four to eight hours or until they have firmed up a bit, close to leather hard. This will give added strength when we join them together.
Alternate Method: For the top half, you can throw a straight cylinder and then finish the rim of the vase after the parts have been connected.
To do this, leave the cylinder attached to the bat. Don't cut the pot off the bat.
Then, to attach the two, take a hold of the bat.
Turn the top half upside down while still attached to the bat, and set it down on the rim of the bottom half.
Connect the two halves as outlined below. Then, finish the rim by continuing to throw the connected pieces on the wheel.
This allows you to create a narrower neck if you desire.
Connect the Top to the Bottom
When the two halves have firmed up a bit, place the bottom half back on the wheel. Remove all of the plastic. Score the bottom rim clay needle. It should still be wet. Add some slip if it is at all dry.
Carefully lift the top half off the bat. You may need to re-cut under the pot. Set it down onto the bottom half so the two pieces fit together. Check that they are lined up.
Tip: It helps to get the wheel turning slowly and then step back a few feet and watch for any irregularity or wobbling in the walls.
Make any adjustments as needed.
Finish the Vase
Then, using a finger or knuckle, blend the two pieces together. Work all the way around inside and out until the two are completely connected.
Lastly, turn the wheel slowly and smooth the joint using your fingers, a sponge, or a rib until the seam is gone.
Be careful not to overwork it and damage the pot. Using a little water is okay, but try not to drip it down the sides.
When the two pieces are fully joined, dry the pot to leather hard. Turn the pot over and smooth the base with a sponge or wet finger.
You can also
trim your clay pot project
on the wheel at this time to create a foot and to remove excess weight from the bottom.
Finally, dry your vase completely,
bisque fire it,
then
glaze it
and you're finished!
Ceramic floor vases are very challenging, so I give you lots of credit for trying one. When you're ready for an even harder challenge, try throwing a large ceramic floor vase with one piece of clay.
Thanks for visiting my online ceramics class and Happy Potting.
Return From Ceramic Floor Vases To
Advanced Projects
Return From Ceramic Floor Vases To
Home
Enjoy this page? Please pay it forward. Here's how...
Would you prefer to share this page with others by linking to it?
- Click on the HTML link code below.
- Copy and paste it, adding a note of your own, into your blog, a Web page, forums, a blog comment,
your Facebook account, or anywhere that someone would find this page valuable.


