Tips for Learning
Pottery Wheel Throwing
This is a collection of the monthly learning pottery wheel throwing tips from the homepage. They're laid out by month if you're looking for a tip from a previous date.
More Tips by Category:
Tips for Making Ceramics Mugs
Tips for Preparing Clay for Throwing
Prevent Wrist Injuries - February 2011
Many people suffer from arthritis, fibromyalgia, tendonitis, and other joint issues.
Any of these conditions can pose severe challenges to learning pottery wheel throwing.
Several years ago I developed a repetitive motion injury in my wrist from making pottery.
It came from centering large amounts of clay over and over with the same hand.
I would bend my wrist back and press very hard with the palm of my hand. It really took the fun out of making pottery.
The pain even prevented me from being able to do pottery from time to time.
Since then, I have adopted two new habits which prevent this type of injury.
First, I alternate hands and centering techniques. This allows each muscle group a chance to rest between pots. It also causes more muscles to develop more evenly in both hands.
Secondly, I focus on keeping my wrist joints in a more naturally aligned position, rather than bending them backward and hyper-extending them.
Third, if I find myself struggling against the clay, it may be too dry. At that point I will definitely opt to use softer clay.
Also, remember to listen to your body, especially if you feel any pain.
Flow with the process, breathe through the movements of throwing.
Remove a Pot From the Wheel Without Squishing It - January 2011
This can be challenging, especially with larger pots, so here are three tips to make it easier.
1) The easiest method is to use a bat when throwing. When you are finished throwing your pot, you simply cut underneath the pot, leave it on the bat to dry, and lift the bat off the wheel. If you have several bats, you can just attach another bat to the wheel and throw your next pot.
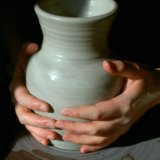
2) A simple, but time consuming method is to cut underneath the pot and allow it to dry for several hours until the walls are stiff enough to grab. Then you can cup your hands around the pot and gently lift it off.
This works well if you don't have any bats. With practice, especially with smaller pots, you can do this even with wet pieces.
3) If you run out of bats and need to remove a pot from a bat before it is dry enough, try this trick.
First, cut underneath the pot with a wire like you normally would. Next, drizzle 1-2 sponge-fulls of water onto the bat along the base of the pot. Then, use the wire again to pull or "cut" the water underneath the pot.
The pot will start to float on the water. Keeping the wire tight, pull it out from under the pot, being careful not to slide the pot off the bat and onto the floor. If the wire gets stuck use quick, short, jerking motions to free the wire.
Finally, lift the bat off the pottery wheel and carefully slide the pot off the bat into the center of a board. Caution, sometimes they slide really fast! This part takes a little practice but once you get the hang of it, it's pretty fun sliding pots around.
Using Bats - December 2010
To make removing pots from the wheel easier, try using a bat.
A bat is a wooden, plaster, or plastic disc that attaches to the wheel, but is easy to remove.
It allows you to throw pots, then remove them from the wheel for drying without having to lift them off the bat.
Removing the bat from the pottery wheel is easy. Just lift it off. Then grab another bat and throw another pot.
Note: Always cut underneath the pot before you set it aside to dry, even if you are leaving it on a bat. Otherwise, when it dries, the bottom may crack from shrinking.
Note: You can attach a bat to the wheel using rings of clay on the wheel or by inserting metal pins into the wheel head. The pins hold the bat in place.
Easy, Awesome Rim Finishing Trick - November 2010
Here's a simple tip that I wish I had been shown when I was first learning pottery wheel throwing.
I finish the rims of my pots using a quick, easy trick that leaves them polished smooth and perfectly rounded every time. Here's how to do it:
First, cut a 2" x 5" strip out of an ordinary plastic grocery bag. Next, fold it in half lengthwise, so it is 1" x 5".
Spin the pottery wheel slowly. Holding tightly onto each end of the plastic strip, gently wrap it over the lip of the rim.
Notice how the plastic polishes and smooths it. Adjust your hand position and pressure to create just the right shape that you want for your rim.
Be careful not to push down too hard. You don't want to collapse the rim.
Keep it Fun - October 2010
In pottery as in life it's easy to take ourselves too seriously. When you find yourself feeling frustrated, remember, pottery, and life are meant to be fun.
The best way to remind yourself of this when learning pottery wheel throwing is to do something unexpected. Here are a few ideas:
1) Pour some slip on your pottery wheel head and draw patterns in the mud while the wheel spins. (If you've done this you know how fun it is. If not, give it a try.)
2) Make an odd shaped pot or intentionally throw a pot waaaay off center.
3) Add a foreign object to a pot such as a stick, a coin, or a hand full of gravel (probably don't want to fire this one).
4) Toss, roll, stretch, or juggle a pot.
5) Find SOMETHING to laugh at, even if it's your own seriousness.
Thanks for reading, and Happy Potting.
Return From Tips for Learning Pottery Wheel Throwing
To Pottery on the Wheel Homepage
Enjoy this page? Please pay it forward. Here's how...
Would you prefer to share this page with others by linking to it?
- Click on the HTML link code below.
- Copy and paste it, adding a note of your own, into your blog, a Web page, forums, a blog comment,
your Facebook account, or anywhere that someone would find this page valuable.


