


|
Ceramic Mixing Bowls
Every fine kitchen deserves a quality set of ceramic mixing bowls. See how they are made from raw clay to the kitchen counter.
SizeTo get the size just right, begin by measuring out three balls of clay.
Before
AfterIn the photos above you can see how I divided the clay into progressively larger pieces to create each bowl. I know the balls of clay look kind of huge. Keep in mind the photos of the balls of clay are not to scale with the photos of the bowls. I typically divide the clay by size rather than weight. If you are going by weight and the first ball is one and a half pounds, the second should be two pounds and the third should be two and a half pounds. ShapeTo get consistent shapes for the whole set, the key is good comparison. You have to look at the pots from different angles to match up the shapes well. Tip: Place a mirror across from you so that you can see the shape of the pot from the side without having to lean over every time.
They should grow progressively wider and taller so that the smaller ones will fit inside the larger ones. Lift the pot off the wheel on it's bat and hold it up to the other pots for comparison. Tip: You can cut out a cardboard template for each size beforehand. Compare the template to the outside of the pot from time to time as you refine the shape.
Throwing Tips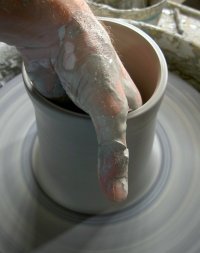

Here is a great trick to forming a strong, attractive, large bowl. First, throw a slightly thicker- than- normal cylinder. Then, pull the cylinder slowly open into your bowl shape. Start at the bottom and work your way up to the rim. Use plenty of water. You can refine the shape a little bit at this point, but try not to make drastic changes as this compromises the strength of the walls. FinishingLeave a nice solid rim to give it increased strength.
Wrap it gently over the rim while your pot is spinning and it will polish the rim to a perfectly smooth rounded finish. Words can hardly express the incredible results you can achieve with such a simple technique. That's all there is to it. You'll often want to throw four or five pots to get the perfect set of three ceramic mixing bowls. The extras can be discarded or used as individual pasta bowls. See the section on painting clay pots with glaze and also check out the section about firing pottery for help finishing your pots. I hope you enjoyed this lesson and Happy Potting. Return From Ceramic Mixing Bowls |


Learn Right
The First Time
Pottery on the Wheel for Beginners

is a complete beginners guide
to learning pottery.
It will
take you from
never having touched clay
to creating finished pottery
you can use every day.
Also read it on Kindle
Featured Pages


Choose Your Wheel
Thank you so much for
visiting my website!
Discover How I Made It!
Happy Potting!
- Steve