Pottery Glazes - Finishing
Your Clay Pot Projects
Learn specific techniques for painting clay pots with pottery glazes. Bring your clay pot projects to life with rich colors and textures.
The wide variety of pottery glazes and glazing techniques can be dizzying. On the main glazing page
Painting Clay Pots With Glaze
we covered four common methods for application of glaze: dipping, pouring, brushing, and spraying.
Now we'll take a deeper look into some creative techniques. One thing to remember is that although we are learning how to use store bought
pottery clay
and glazes, you can also learn
how to make homemade clay
and glazes. For now, though, let's look at various glaze types.
About Glazes

Surface:
Surfaces range from glass-like gloss to earthy matte.
Effects:
A wide range of visual effects can be achieved in the surface of the glaze.
Crystal glazes have a prismatic, crystalline image.
There are also speckled, mottled, and uniform glazes.
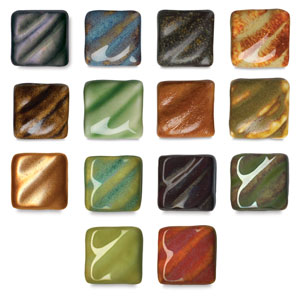
Colors:
There is an endless array of pottery glazes in existence. Just flip through a ceramic magazine and you'll see that glazes come in every color of the rainbow. Colors tend to be brighter at the lower firing temperatures. Bright reds are difficult to achieve, but they are possible, especially at lower temperatures. Higher temperatures tend to encourage more earthy colors.
Textures:
Some glazes will be intentionally drippy, while others are designed to crack, called "crazing", or to leave patches of bare clay, called "crawling". With many glazes, thicker areas will be a completely different color than thinner areas. This gives an incredibly rich, activeness to the surface of the pot.
One example would be with clay coffee mugs. If you imprinted a pottery stamp into the handle of a ceramic coffee travel mug, the rim, the edges of the handle, and the raised portions of the pottery stamp image would be high-lighted by the mottled variations of the glaze.
Now on to application techniques.
Waxing
Create textural contrast by leaving parts of your pot unglazed. This is done by applying wax to certain areas of your clay pot projects. It's similar to the technique of waxing the bottom of the pot to keep it free of glaze.
Wax resist is a liquid wax that requires no heating. You can paint clay pots with it to create a pattern before glazing. You can create striped bands, lettering, or images with the wax. Then, when you apply the glaze it won't stick to the wax.
Tip: Be sure to let the wax dry thoroughly before glazing. Otherwise, the liquid wax will get in your glaze and on your fingers and create a mess. Also, be sure to wipe any excess glaze off of the surface of the wax with a damp sponge before firing.
You can also draw on your pot with wax crayons for a similar effect.
Layering
Layering glazes is a great way to create interesting new results for your clay pot projects using glazes that you already have. You can completely cover the pot in two different glazes, or you can dip half in one glaze and the other half in another glaze. Where the two glazes overlap they will mix, creating a third color.
Tip: Dip the rim of your ceramic travel coffee mug in a different color to give it extra contrast.
Stains
Stains are pure color that can be sprayed or brushed over or under the glaze to add details, and color. You can also create speckles on your pot by splattering stain over the glaze with the bristles of a toothbrush.
Tip: Stains tend to move with the glaze when it melts, which will cause blurring, so test your stain first before creating a very intricate design.
Underglaze
Underglaze is a colorant, such as stain, that is mixed with clay to make it more stable. This prevents it from running and blurring like a stain is prone to do when applied over a glaze. Underglaze got it's name because it is applied to the raw bisque "under" the glaze.
Sgraffitto
Sgraffitto involves covering the pot with a stain or underglaze and scratching through it to reveal the clay underneath. It is first done on greenware, then fired to bisque, and finally glazed over with a light or clear glaze. Sgraffitto is excellent for fine detail and bold contrasts.
Intaglio
Intaglio creates an antiqued effect on your clay pot. It differs from sgraffitto in that you carve or etch into the greenware first. Then, you fire the pot to bisque. Next, you brush or sponge stain into the surface of the carved design. Finally, you wipe the excess stain away from the surface with a sponge. The carved areas retain the stain, creating an interesting antiqued effect.
Final tip: Test and play with pottery glazes at every opportunity. Throw 4" tall by 2" wide cylinders and test different glaze combinations and techniques on them. Keep track of your experiments in a
ceramic journal
so you can re-create them later. Number your pots on the bottom with a corresponding description in your ceramic journal to stay organized.
Thanks for learning about different pottery glazes and glaze application techniques and Happy Potting.
Return From Pottery Glazes
To Painting Clay Pots
Return From Pottery Glazes
To Pottery on the Wheel Home
Enjoy this page? Please pay it forward. Here's how...
Would you prefer to share this page with others by linking to it?
- Click on the HTML link code below.
- Copy and paste it, adding a note of your own, into your blog, a Web page, forums, a blog comment,
your Facebook account, or anywhere that someone would find this page valuable.


