|
Pottery StampsThe artist's markings on a pot are the signature that finishes it. Pottery stamps are used by many artists to permanently imprint their presence on the pot. Stamps can be made from a variety of materials. They can be used to stamp a mark into the clay, create a relief image projecting from the clay, or stamp a design onto the surface of the clay using a glaze or stain. Stamps are easy to make and fun to use. I sign most of my own pots with a stamp that I made in the shape of a sunflower. Let's take a look at how to make a pottery stamp out of clay. Relief Stamp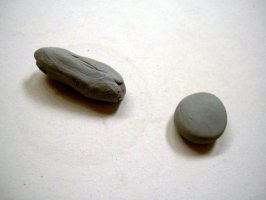
To make a flower stamp, first roll a ball of clay in your hand so that it's the size and shape of a grape. Flatten it slightly between your palms so it forms a thick disk. Next, roll another grape size ball into a thick coil and attach it securely to the disk.
Be sure to attach the two parts immediately so they for a good bond. If they dry out too much you'll have to use some clay slip to attache them.
Use the end of a pen or a small dowel to make a circle in the center for the middle of the flower. Then use a sharpened pencil, thin stick, or wooden clay knife (my preference) to imprint petal shapes radiating out from the center. Let your stamp dry. Fire it and it's ready to use. When you press it into the clay it will create flower petals in relief.
Imprint StampTo make an imprint in the clay, the pattern on the stamp must stick out from the surface. To make an imprint of the same flower as above, first draw a flower pattern onto the stamp. Then, scrape away the background or negative space. Tips: It can be helpful to let it dry just a bit before carving. Imprint stamps can be carved out of wood as well. Surface StampLastly, you can stamp images with glaze or stain onto the surface of the pot. This is done with an ink stamp like in scrap-booking. You can brush or sponge stain onto the surface of the stamp or even use a stamp pad. You can also carve your own stamps. Tips: Press a stamp into the bottom attachment of a mug handle. This works best on hand-pulled handles. Try stamping around the outside rim of a bowl to create a decorative textural band. Making a stamp with lettering on it? Remember to write the letters backward because your stamp will imprint a mirror image of what you are seeing. Finally, try pressing other objects into your pottery. Some favorites are: jewelry, leaves, and silverware handles. Whatever techniques you use to make pottery stamps, play around with a variety of different pottery markings and enjoy the process. Happy Potting.
Return From Pottery Stamps |
Learn Right
The First Time
Pottery on the Wheel for Beginners
is a complete beginners guide
to learning pottery.
It will
take you from
never having touched clay
to creating finished pottery
you can use every day.
Also read it on Kindle
Featured Pages
Choose Your Wheel
Thank you so much for
visiting my website!
Discover How I Made It!
Happy Potting!
- Steve


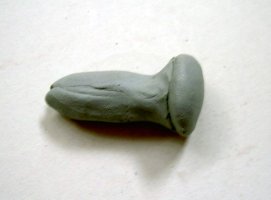 Now your stamp has a handle.
 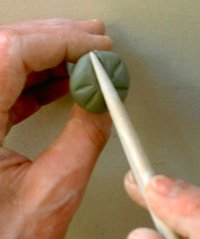 Finally, imprint a flower pattern into the surface of the disk.

