|
Clay Pot ProjectsCraft Ideas, How to Make a VaseWelcome to the best site for learning to make your own clay pot projects. Get step by step instructions on how to make pottery bowls, vases and mugs. Find craft ideas for kids of all ages. Of all the clay pot projects I'll show you, the vase is one of the simplest yet most versatile. Vases can be tiny (see
mini pots)
or they can be huge (see
ceramic floor vases).
Practice it a few times. Then, I'd encourage you to expand your skills and try some tiny ones and work up to some big ones. Shaping a Vase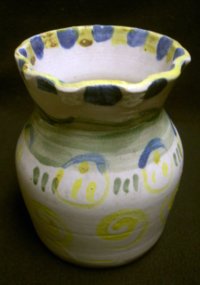
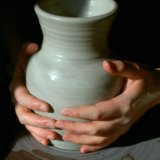
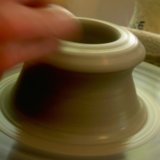
Once you can throw a centered cylinder, you can throw a vase. To make a vase you're going to start with a basic cylinder. There are two simple steps to transforming the cylinder into a vase. First, push out the lower half of the wall to form a rounded bottom on the vase. Then, squeeze in the neck to give it an elegant curvature. The vase on the left is an example of a simple vase with a little bit of alteration. As you can see the rim has been altered by hand to add some character to it. This can be done by simply pulling out on the rim with one finger, while you support the rim on both sides with the fingers of your other hand. Then slowly work your way around the pot. Tips: 2) To squeeze in the neck, use your first finger and thumbs to create four points of contact. You can even use the knuckle of the your second finger to make six points of contact on the neck of the vase. Wet the pot first. Then gently squeeze in on the neck, about 2/3 of the way up the pot. Again, a little pressure goes a long way. 3) Finally, to finish it off, you can flare out the rim a little. Be careful not to fuss with the pot too much after you've shaped it. Once it has been shaped it will be much more delicate than when it was a straight cylinder. The differences between various types of vases just depends on the height of each vase, as well as the ratios between the neck, the rim, and the rounded bottom. When you are finished, dry your pot completely, then
learn about firing pottery
and finally, learn more about decorating and finishing your crafts with
pottery glazes.
I hope you enjoyed the lesson. Experiment with different sizes and shapes until you find some that you really love. Thanks for reading, and as always, Happy Potting.
Return From Clay Pot Projects - Vases |
Learn Right
The First Time
Pottery on the Wheel for Beginners
is a complete beginners guide
to learning pottery.
It will
take you from
never having touched clay
to creating finished pottery
you can use every day.
Also read it on Kindle
Featured Pages
Choose Your Wheel
Thank you so much for
visiting my website!
Discover How I Made It!
Happy Potting!
- Steve


